I think everybody knows already the popular SSD1306 0.96″ OLED Display available all over the place for a very good price:
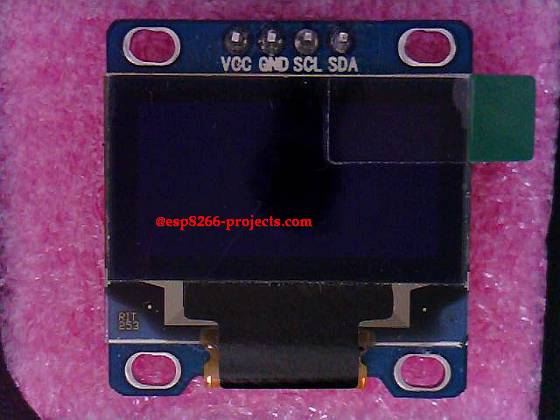 |
| SSD1306 0.96″ I2C OLED Display |
My first option for a Alphanumeric Display still remain the ST7032i LCD one, but as looking also for a Graphical Display option found this SSD1306 OLED as a easy to use one with the CBDB nEXT EVO Board.
It is a very good choice because:
– From the Hardware point of view, as been a Display with a native I2C interface, it is very easy to connect thru the CBDB EVO nEXT Bus (no extra wires, PSU, etc)
– From the Software point of view, even more good news:
- if you want to use NodeMCU in your projects, a driver for SSD1306 is already there, based on the u8glib library.
- if you want your Arduino IDE also the u8glib driver is there!
- Full Datasheet available, so you can also implement your own driver very easy.
The SSD1306 is a 128×64 Dot Matrix Driver/Controller manufactured by Solomon Systech.
Controller Power Supply for IC Logic is between 1.65V to 3.3V so we have here a 3.3V compatible device, no need for any kind of logical levels converter.
I will not insist too much about the SSD1306 controller, just one thing that might worth to explain a bit, as it looks that it is creating a lot of confusion for many people:
If you look on the back of the module you can see a jumper option for the Display I2C address: 0x7A or 0x78, with default selected on 0x78:
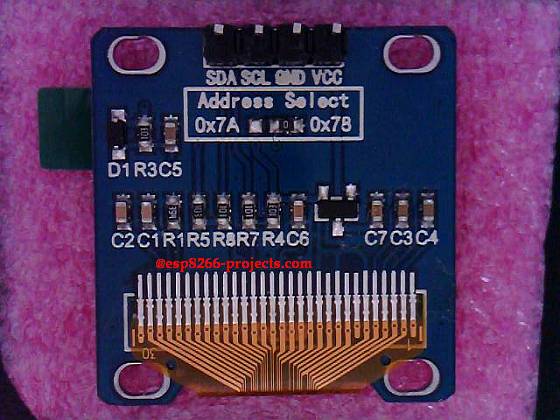
If you will try to use it like that, with the addresses from above, it will not work, as many people has already found it.
Why?
The I2C communication interface consists of slave address with set bit SA0, I2C-bus data signal SDA (SDAOUT/D2 for output and SDAIN/D1 for input) and I2C-bus clock signal SCL (D0). Both the data and clock signals must be connected to pull-up resistors.
SSD1306 has to recognize the slave address before transmitting or receiving any information by the I2C-bus. The device will respond to the slave address following by the slave address bit (“SA0” bit) and the read/write select bit (“R/W#” bit) with the following byte format:
b7 b6 b5 b4 b3 b2 b1 b0
0 1 1 1 1 0 SA0 R/W#
“SA0” bit provides an extension bit for the slave address.
Either “0111100” or “0111101”, can be selected as the slave address of SSD1306.
D/C# pin acts as SA0 for slave address selection, and actually this is a Address Select pin from the above.
So, if we take the 7 Bit I2C address representation from above we will have:
0 1 1 1 1 0 0 – > 0x3C (default)
OR
0 1 1 1 1 0 1 – > 0x3D (alternate)
The 8th bit is the “R/W#” bit and is used to determine the operation mode of the I2C-bus interface:
– R/W#=1 – readmode.
– R/W#=0 – write mode.
For more details please take a look at the SSD1306 Datasheet
What we will need:
- CBDB nEXT EVO Board
- SSD1306 0.96″ I2C Display module
- For programming and uploading the driver and the software we will continue to use the LuaUploader as before.
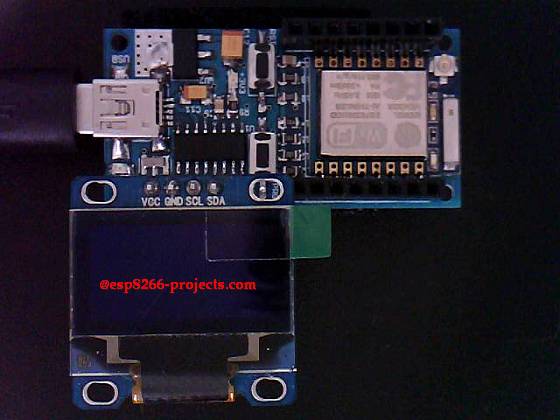
Connection with the nEXT EVO Board is very easy, as SSD1306 connector is fully compatible with the nEXT Bus connector:
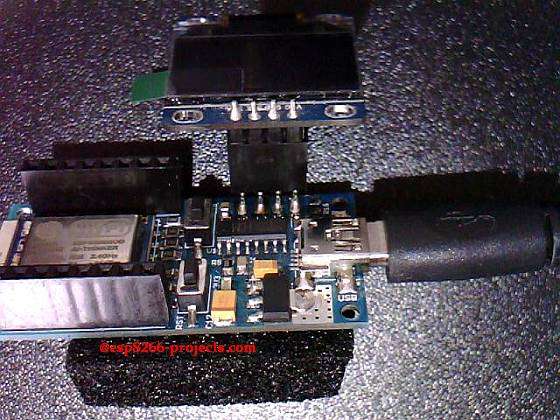 |
| Connecting SSD1306 Display to the CBDB nEXT EVO Board |
No wires, no hasle, a nice and compact unit:
Software implementation
As the driver is already available for this type of Display, for simple projects no driver implemetantion is needed, just few functions to make it running:
1. Display initialisation
function init_OLED(sda,scl) --Set up the u8glib lib
     sla = 0x3C
     i2c.setup(0, sda, scl, i2c.SLOW)
     disp = u8g.ssd1306_128x64_i2c(sla)
     disp:setFont(u8g.font_6x10)
     disp:setFontRefHeightExtendedText()
     disp:setDefaultForegroundColor()
     disp:setFontPosTop()
     --disp:setRot180()           -- use it for rotate display
end
2. Print Text routine
str1="ESP8266-Projects.com"
str2="Hello World!!"

function PrintText()
  disp:drawStr(5, 10, str1)
  disp:drawStr(20, 20, str2)
end
3. Print on Display function
function print_OLED()
   disp:firstPage()
   repeat
     PrintText()
     disp:drawCircle(64, 47, 14)
     disp:drawFrame(2,2,126,62)
   until disp:nextPage() == false
end
4. Main program
str1="ESP8266-Projects.com"
str2="Hello World!!"
init_OLED(2,1)

print_OLED()
5. Drawing animation
function draw_tst()
 for r=1, 31 do
   disp:firstPage()
   repeat
     disp:drawCircle(64, 32, r)
   until disp:nextPage() == false
   tmr.wdclr()
 end

 for r=30, 1, -1 do
   disp:firstPage()
   repeat
     disp:drawCircle(64, 32, r)
   until disp:nextPage() == false
   tmr.wdclr()
 end
  print_OLED() end