This Mailbag can also be seen as Part 4 of the ESP8266 nEXT EVO Analog Extension Board (AN1)
In this part we will continue talking about the ESP8266 nEXT Evo 8 Bit I/O Expansion Port based on the PCF8574 chip from NXP, testing procedures and software programming for the AN1 Board.
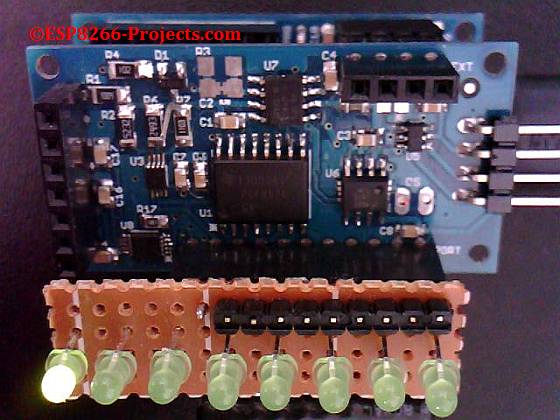
After testing the Output of the 8Bit I/O Port it’s now time to test also the Input function.
So, what can be easier to use for such a processs than some pushbuttons for interaction? I was thinking about some sort of buttons interface and because I just have arround a small 4×4 Matrix Keyboard why not directly a keyboard interface, especially that I’m waiting to receive some very thin membrane ones to be used for some projects.
Previous related Articles:
- New ESP8266 DevBoard – CBDB nEXT EVO – General presentation, schematics, PCB, etc
- Part 2 – ESP8266 DevBoard – CBDB nEXT EVO – Firmware upload
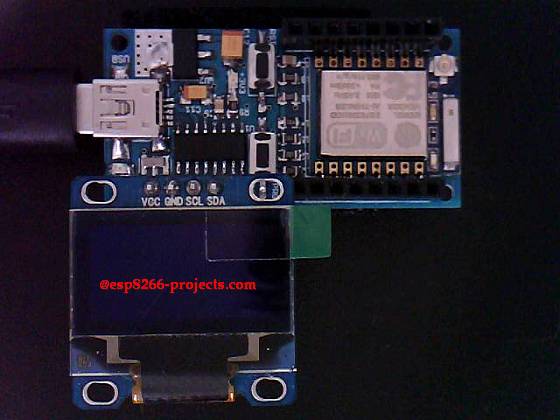
- SSD1306 OLED Display for ESP8266 nEXT EVO Board
- ESP8266 nEXT EVO – Analog Extension Board – Part 1 – General view, schematics, PCB, etc
- ESP8266 nEXT EVO – Analog extension Board – Part 2 – I2C Bus Protocol, scanbus example.etc
- ESP8266 nEXT EVO – Analog extension Board – Part 3 – PCF8574 8Bit I/O Port Explained
————————————————————————————————————————–
For any new CBDB orders/requests please feel free to use as usual:
tech at esp8266-projects.com.
ESP8266 nEXT Evo bare PCB has also been made available directly at Dirty PCBs, our preferred PCB House for experimenting (**):
http://dirtypcbs.com/view.php?share=9699&accesskey=91d782fd4a10943fd36ecc371c7ff2cd
(**) – Actually you have there 2 Boards for the price of one, a ESP8266 nEXT Evo together with a AN1 nEXT Analog Extension Board that brings you a 18Bit ADC (autoscale 0-40V input!), 4x12Bit DAC, Precison Temperature measurement, 8bit I/O port, etc.
————————————————————————————————————————-
What we will need:

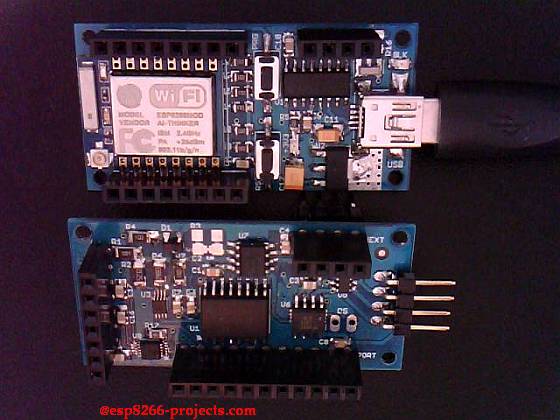
- ESP8266 nEXT EVO Board
- ESP8266 nEXT EVO – Analog Extension Board – AN1
- 4×4 Matrix Keyboard (update: nice, very thin, membrane one here )
- For programming and uploading the driver and the software we will continue to use the LuaUploader as before.
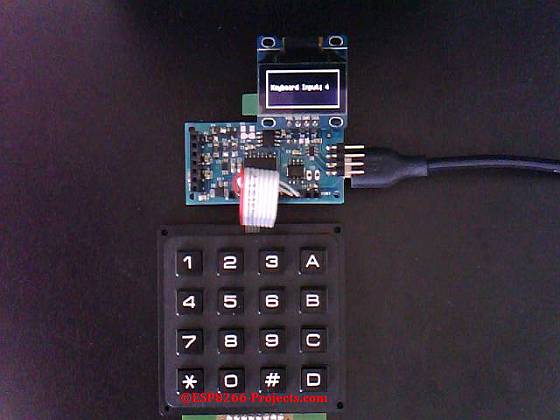 |
4×4 Matrix Keyboard connected to the ESP8266 nEXT Evo Board 8Bit I/O Expansion Port |
For more details and explanations please take a look at the Youtube Video from above: https://youtu.be/cVv7GCHmZ_o
Software implementation
For a better understanding of the way how the PCF8574 8Bit quasi-bidirectional I/O Port is working it might be a good idea to look at the previous related article and the PCF8574 Datasheet
1. Init I2C bus/interface
-- init I2C nEXT BUS
function i2c_init()
    i2c.setup(id, sda, scl, i2c.SLOW)
end
2. Set PCF8574 PORT Register Function
function setPort( port, stat)
    i2c.start(id)
    i2c.address(id, dev_addr ,i2c.TRANSMITTER)
    i2c.write(id,stat)
    i2c.stop(id)
end
3. Set Port function
Just a nicer way to write data to PCF8574 Register. Remember that we need to write a “ZERO” to the corresponding bit. We are sinking not sourcing !!
function setPortdata(p)
    pp = 255-p
    setPort(0x20,pp)
end
4. I/O Port READ Input
function read_input(dev_addr)
       i2c.start(id)
       i2c.address(id, dev_addr,i2c.RECEIVER)
       c = i2c.read(id,1)
       d = 255-string.byte(c)
       i2c.stop(id)
       --print("Read Value : "..d)
       return c,d
 end
5. OLED DISPLAY Related Functions
5.1 Init OLED Display
 function init_OLED(sda,scl) --Set up the u8glib lib
     sla = 0x3C
     i2c.setup(0, sda, scl, i2c.SLOW)
     disp = u8g.ssd1306_128x64_i2c(sla)
     disp:setFont(u8g.font_6x10)
     disp:setFontRefHeightExtendedText()
     disp:setDefaultForegroundColor()
     disp:setFontPosTop()
     disp:setRot180()
end
5.2 Print TEXT on Display
function PrintText()
  disp:drawStr(10, 25, str1)
  disp:drawStr(105, 25, str2)
end
5.3 Print_LCD Function
function print_LCD()
   disp:firstPage()
   repeat
     PrintText()
     disp:drawFrame(2,2,126,62)
   until disp:nextPage() == false
end
6. Main Program
str1="Keyboard Input:"
str2="KEY"
id = 0
sda=2                           -- GPIO4
scl=1                            -- GPIO5
dev_addr = 0x20          -- PCF8574 Address
 port={1,2,4,8}              -- COLS definition
row={128,64,32,16}     -- ROWS definition
key={'1','4','7','*','2','5','8','0','3','6','9','#','A','B','C','D'}   -- keys translation table

i=1
j=1
k=1
init_OLED(2,1)
print_LCD()
tmr.alarm( 0, 100, 1, function()
  setPortdata(port[i])                        -- activate COL[i]
  read_input(dev_addr)                     -- read active ROW

  while j<5 do
      if d==port[i]+row[j] then
            print("Col[i] = "..port[i])         -- for debug only
            print("Row[j] = "..row[j])        -- for debug only
            print("Read Value : "..d)           --for debug only
            print("Read Key   : "..k)            -- for debug only
            print("Pressed KEY Value : "..key[k].."\n")    -- print pressed KEY value
            str2=key[k]
            print_LCD()                              -- print also on Display
      end
      j=j+1
      k=k+1
      tmr.wdclr()
   end
  j=1

  i=i+1
  if i>4 then i=1
  end
  if k>16 then k=1
  end
end)